
When working with CSS it’s easy to get stuck with just the basic selectors. Yes, you can get by using only those but you will write better and more terse code if you know some of the more advanced ones. In this article I will show you the power of CSS Combinators - A toolkit that lets you combine the basic selectors to create more powerful CSS.
A base HTML
For the sake of explanation I’m going to use a simple HTML structure to illustrate how each selector works. It’s fairly simple and only contains a few basic elements:
1 2 3 4 5 6 7 8 9 | |
It’s a simple structure but it will serve well for our purpose.
The DOM
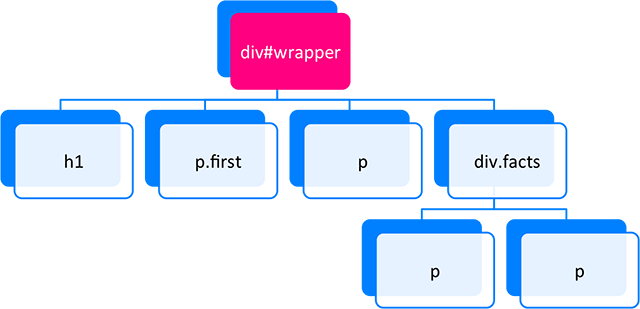
I often find it useful to look at the HTML as a tree structure when trying to understand how different CSS selectors work. In fact, HTML forms a tree structure in the browser called the DOM - which is short for the Document Object Model.
The HTML structure above could be visualized like this:
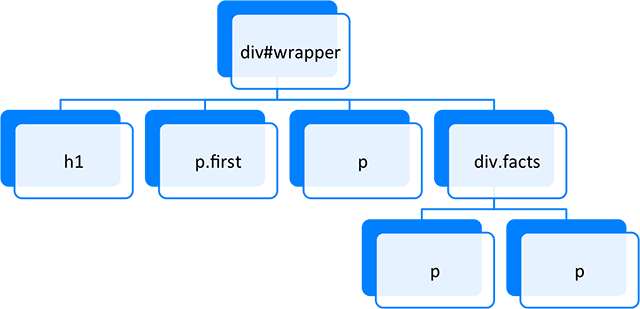
As you can see some elements are below other elements and some elements sits side by side.
It’s actually like a family tree and the relations between the elements are in fact called things like parent, child, sibling and descendant.
A recap of the most basic CSS selectors
To cover our bases I’m going to do a quick recap of the four most basic selectors. If you’re already familiar with these, feel free to skip ahead to the section about the combinators.
- The Universal Selector
- The Element Type Selectors
- The Class Selectors
- The ID Selectors
The Universal Selector
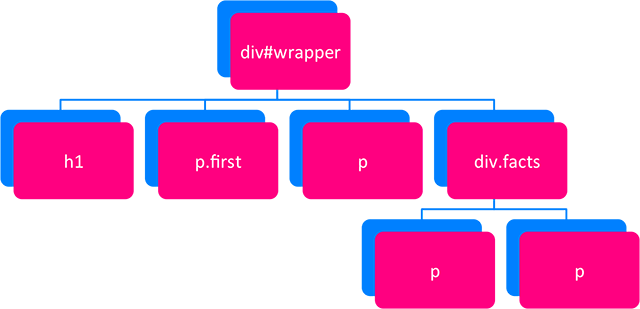
The Universal Selector is an asterisk (*) and applies to all elements in the DOM. It’s useful when you want to target several different element types.
1 2 3 | |
This selector would affect all of the elements in the DOM-tree:
An obvious use case for this selector is to create a simple CSS Reset. You can have this selector at the top of the CSS and set all the properites of all HTML elements to default values.
The Element Selector
1 2 3 | |
The Class Selector
1 2 3 | |
The ID Selector
Since there can be only one specific ID in a HTML document, the ID Selector always target a single element. It uses hash (#) and could look like this.
1 2 3 4 | |
So far no surprises. You’re probably already familiar with these selectors and with that brief recap out of the way lets move on to more intesting things, namely the CSS Combinators.
The Combinators
The combinators are used in conjunction with the basic selectors. As the name suggest they enable you to combine other selectors in different ways so that you don’t have to have a class or ID on every single element that you want to target.
So why is this good then? Well it serves you well to keep the HTML and CSS as separated as possible. The least amount of extra attributes you have in the HTML the better. It will not only reduce the page size but also make maintenance easier.
To learn more about the benefits of keeping the HTML and CSS as separate as possible, read the article Separation of Concerns https://codecraftingblueprints.com/post//separation-of-concerns which explores the benefits in greater deatail.
Now, lets move on to the combinators.
CSS Combinators
There are four different combinators in CSS and they each bring their own unique benefit:
- The Descendant Selector
- The Child Selector
- The Adjacent Sibling Selector
- The General Sibling Selector
The Descendant Selector
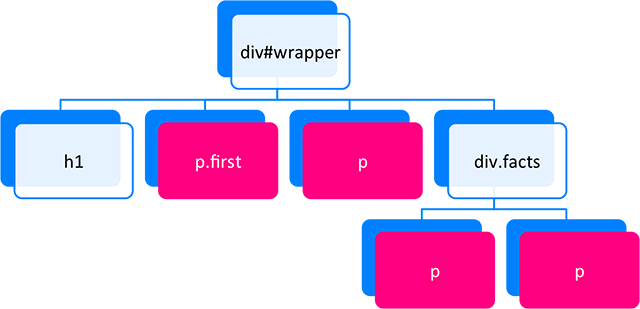
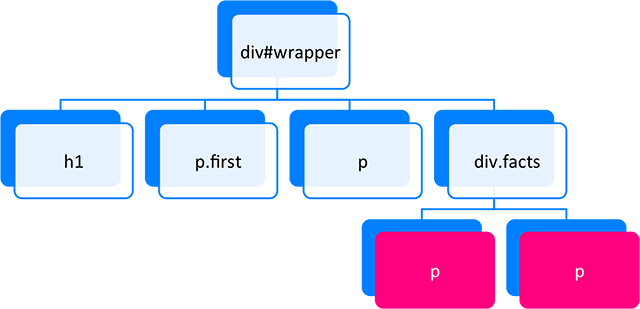
The Descendant Selector is just two or more selectors after each other, separated by whitespace. If for example you only want to target the <p> elements inside of the <div class="facts"> you could write:
1 2 3 | |
With this code only <p> elements that lives below the element with the class="facts" are targeted.
The Child Selector
The Child Selector is a bit more specific than the previous one. It looks almost the same but you add a greater than character (>) between the two selectors. Doing this you make sure that only the elements that sits on the level immediately below the first selector are targeted.
1 2 3 | |
Now only the <p> elements immediately below <div id="wrapper"> are affected.

This is great for dealing with deeply nested structures where you want the styling to only target one level.
A common use case is when styling drop-down menus. These are often constructed with nested lists (<ul>) where you want the lists to have different styling depending on which level they appear.
The Adjacent Sibling Selector
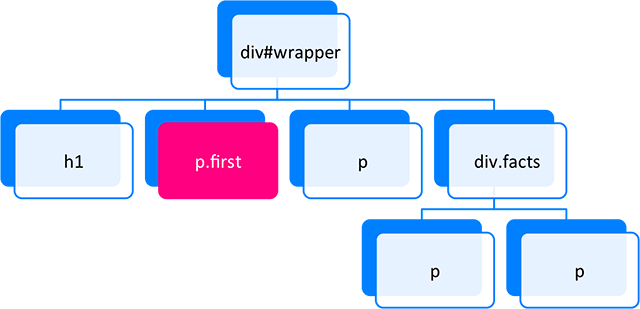
The Adjecent Sibling Selector targets only elements that’s immediately after an element on the same level in the DOM-tree. It’s used by inserting a plus (+) between the first and the second selector.
1 2 3 | |
Now only the <p> that’s directly after the <h1> is affected.

A common use case for the Adjacent Sibling Selector is when you want the first paragraph in an article to have bigger text than the rest of the paragraphs. You could of course add a class such as .first to it but it’s nicer to not have to add extra attributes in the HTML. Instead you could write something like this:
1 2 3 4 5 6 7 | |
The General Sibling Selector
The General Sibling Selector targets elements that are siblings, but unlike the Adjacent Sibling Selector, the targeted element doesn’t have to appear immediately after the first element. It’s constructed using a tilde (~) between the two selectors.
1 2 3 | |
Now both <p> elements are affected since they’re all on the same level as the <h1>.

Note that the affected elements need to appear after the target element. So if we have the HTML below, only the two <p> elements that appear after the <h1> will be affected.
1 2 3 4 | |
Conclusion
CSS Combinators are great for reducing the amount of extra classes and ID’s in your HTML and they have pretty good browser support too, at least if you target IE7 and above.
All of the combinators except the General Sibling Selector, are part of the CSS 2.1 specification which means that they’ve been around for quite some time. The General Sibling Selector is part of the CSS 3 specification but it still has really good browser support.
I hope that you will find CSS Combinators useful in your future CSS coding!
Can you think of more use cases for the combinators? Let us know in the comments!